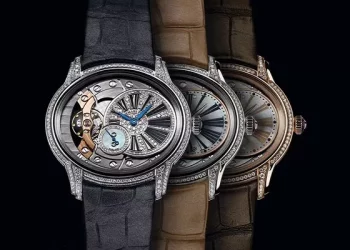
Bulova is a brand synonymous with elegance, precision, and craftsmanship. For watch enthusiasts, owning a Bulova automatic watch is more than just about telling time; it is about appreciating the art of watchmaking. Setting an automatic watch may seem complex at first, but with a little guidance, it becomes a simple task. In this article, we will walk you through how to set a Bulova automatic watch, explaining the steps in detail and breaking down key watch terminologies along the way. Whether you are new to automatic watches or simply need a refresher, this guide will help you properly set your Bulova automatic timepiece.
What is a Bulova Automatic Watch?
Before we delve into how to set a Bulova automatic watch, it’s important to understand what makes these timepieces special. Automatic watches, also known as self-winding watches, are powered by the motion of the wearer’s wrist. This motion drives a small rotor inside the watch that winds the mainspring, providing energy to run the watch. Unlike quartz watches, which require a battery, automatic watches harness mechanical energy, making them a symbol of tradition and craftsmanship in the watchmaking world.
Bulova, known for their commitment to quality, has been producing watches for over 140 years. Their automatic watches combine modern design with mechanical innovation, creating timepieces that are both functional and stylish.
Tools You Will Need
Setting your Bulova automatic watch doesn’t require many tools, but there are a few things you should have on hand to make the process easier:
Your Bulova Automatic Watch – Ensure you have the watch in hand.
Clean Surface – To prevent any dirt or dust from damaging the watch, use a clean, flat surface for the process.
Soft Cloth or Pad – Lay the watch on a soft cloth to prevent scratches.
Step-by-Step Guide to Setting Your Bulova Automatic Watch
Now, let’s dive into the process of setting your Bulova automatic watch. This section will guide you through each step in the setting process, covering everything from winding the watch to adjusting the time and date.
1. Winding Your Bulova Automatic Watch
Before you can set your Bulova automatic watch, it’s essential to wind it if it’s been left unworn for some time. Automatic watches don’t run on batteries, so they need to be wound either manually or through wrist movement.
Manual Winding:
Hold the watch firmly with one hand and use your other hand to turn the crown (the small knob on the side of the watch) clockwise.
Wind the crown in small increments for 20-30 turns. This will ensure that the mainspring inside the watch is properly wound and will start running.
Automatic Winding:
If your Bulova watch is worn regularly, the motion of your wrist should be enough to keep it wound. To check if it’s running, simply give the watch a few gentle shakes to see if the second hand starts moving.
2. Pulling Out the Crown
The crown on your Bulova automatic watch has multiple functions, depending on how far it is pulled out. There are typically three positions:
Position 0 (Closed): The crown is fully pressed into the watch case. In this position, the watch is wound but not in use for setting.
Position 1 (Date Setting): The crown is pulled out just slightly. This is used for adjusting the date.
Position 2 (Time Setting): The crown is pulled all the way out, used for adjusting the time.
3. Setting the Date
If your Bulova automatic watch has a date function, it will be displayed either in a small window on the dial or as a digital readout. To adjust the date:
Pull the crown to Position 1. This is the first click, and it will allow you to adjust the date without affecting the time.
Turn the crown clockwise or counterclockwise to adjust the date. Some watches may require turning the crown clockwise to advance the date, while others may require counterclockwise. If you’re unsure, refer to the specific model’s manual for guidance.
Push the crown back to Position 0 once the date is set. This ensures that the crown is secure and prevents dirt or moisture from entering the watch.
It’s important to set the date correctly, especially if the watch has a quickset date feature. Adjusting the date at the wrong time (usually between 8 PM and 4 AM) can damage the internal mechanism, as the date-change function might be engaged during these hours.
4. Setting the Time
Now that the date is set, it’s time to adjust the time. This process involves pulling the crown out to Position 2 and adjusting the hands.
Pull the crown all the way out to Position 2. In this position, you can adjust the time.
Turn the crown clockwise or counterclockwise to move the hands. The direction in which you turn the crown depends on your watch model, but most Bulova automatic watches follow the clockwise direction to advance the time.
Set the time accurately, making sure the hands align correctly with the current hour and minute. For best accuracy, use an online time reference to ensure the exact time.
Ensure AM/PM Setting is Correct – If your watch has a 12-hour format, make sure to set the hands so the time is correct in either the AM or PM setting. For watches with a 24-hour format, this won’t be necessary.
Push the crown back to Position 0 once the time is set. This will lock the crown in place, ensuring that no dirt or moisture can enter the watch.
5. Checking for Accuracy
Once the time and date are set, it’s always good practice to double-check for accuracy. You can do this by comparing your Bulova automatic watch with an accurate time reference, like the time on your phone or a world clock. Automatic watches can lose or gain a few seconds per day, so checking for accuracy periodically is essential.
Additional Tips for Maintaining Your Bulova Automatic Watch
Taking care of your Bulova automatic watch will ensure it continues to run smoothly for years to come. Here are some maintenance tips:
Wear Your Watch Regularly: Automatic watches are powered by motion, so wearing your Bulova watch daily will keep it running without needing frequent manual winding.
Store It Correctly: When you’re not wearing your watch, store it in a safe, dry place. Avoid exposing your watch to extreme temperatures or humidity.
Keep the Crown Tight: Always push the crown back into the case to prevent dust, dirt, or moisture from entering the watch.
Avoid Shock: While Bulova automatic watches are durable, they can still be damaged by significant impacts. Avoid dropping or knocking the watch against hard surfaces.
Regular Servicing: Just like any high-end timepiece, an automatic watch needs servicing every few years to maintain its mechanical components. Have your Bulova automatic watch professionally serviced to keep it in optimal working condition.
Troubleshooting Common Issues
Even though Bulova automatic watches are built with precision and quality, there are some common issues you might encounter when setting or wearing them. Here are a few tips for troubleshooting:
The Watch Isn’t Running: If your watch stops running, it might need a manual wind. Give the crown several turns to ensure the mainspring is fully wound. If it still doesn’t start, there could be an issue with the movement, and you should have it checked by a professional.
The Date Won’t Change: If the date doesn’t change at midnight or you experience difficulty adjusting it, ensure you are not adjusting the date during the restricted hours (usually between 8 PM and 4 AM). Also, check that the crown is pulled out to the correct position.
The Time is Gaining or Losing Seconds: Minor time deviations (a few seconds per day) are normal for automatic watches. However, if the watch is gaining or losing large amounts of time, it may need to be serviced.
Conclusion
Setting your Bulova automatic watch is a simple but important task that ensures your timepiece runs efficiently and accurately. By following the steps outlined in this guide, you can easily set the time and date on your watch, while also taking steps to maintain its performance over time. Automatic watches offer a timeless connection to the craftsmanship of traditional watchmaking, and with proper care and attention, your Bulova automatic watch will continue to be a reliable companion for years to come.
Related Topics:


